What Is a Stage Lighting Layout with LED Products?

Time:2026-10-15 Author:Sienna
0%

A stage lighting layout with LED products is more than a row of bright fixtures. It is a controlled visual system for faces, scenery, movement, color, and audience focus. The U.S. Department of Energy reports that LED lighting can use at least 75% less energy than traditional incandescent lighting and can last many times longer. Those benefits matter in theaters, touring productions, schools, and event venues where fixtures operate for hours.

The question is practical: How to design a stage lighting layout with LED products without creating flat faces or harsh shadows? A reliable plan begins with the stage dimensions, viewing angles, performer positions, power access, and control protocol. Front light should reveal facial detail. Side light can shape bodies and dance movement. Backlight separates performers from dark scenery. A narrow LED profile fixture may create a crisp special, while a soft LED wash can cover a wide area with fewer units. Small details matter.

Industry research supports this shift. Grand View Research identifies energy efficiency, long service life, and controllable color as major drivers of LED lighting adoption. The 2024 ETC Stage Lighting Handbook also emphasizes beam control, color quality, fixture placement, and safe operation. Yet product specifications can mislead. A higher lumen number does not always produce better stage visibility. Cheap color mixing may look uneven on skin. I have seen layouts that looked impressive on paper but failed during rehearsal. Test the actual fixtures, mark the beams, and check shadows from the audience viewpoint. There is no perfect diagram. Good design leaves room for adjustment.
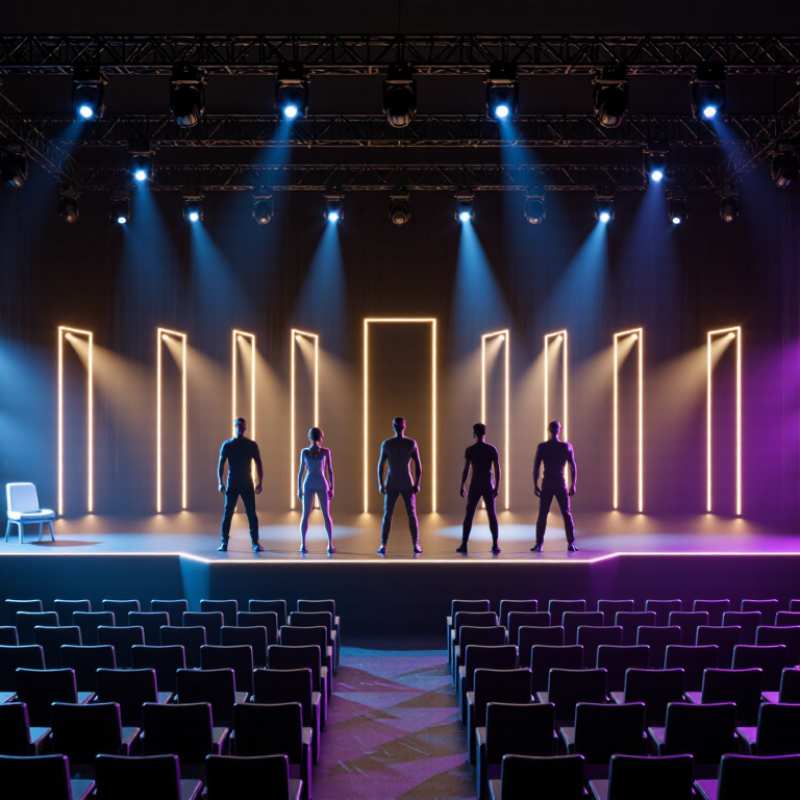
What Is a Stage Lighting Layout with LED Products?

What a Stage Lighting Layout Defines

What Is a Stage Lighting Layout with LED Products?

What a Stage Lighting Layout Defines

A stage lighting layout is more than a drawing of LED fixtures. It defines where light comes from, what it reveals, and how performers remain visible. The plan maps fixture positions, beam angles, color choices, control channels, power routes, and access points. It also establishes visual zones, such as the presenter’s face, a backdrop, a doorway, or a moving performance area. Good layouts protect sightlines. They reduce harsh shadows without making the stage look flat.

In practical work, I measure the stage, ceiling height, audience view, and available electrical load before placing fixtures. A side light may shape a dancer’s shoulders, while soft front light keeps facial details readable. Small changes matter. A fixture moved one meter can alter glare, coverage, and shadow direction. LED products offer flexible color and intensity control, but flexibility can encourage over-lighting. I sometimes leave a darker area deliberately. It gives the eye somewhere to rest. Still, that choice needs testing; a beautiful plan can fail when scenery blocks the beam.

Tips: Mark real obstructions on the drawing. Check beam spread from audience height. Test skin tones and white fabrics under working colors. Label every circuit and control address. Keep spare cable paths visible. Review the layout during rehearsal, not only on paper.

What Is a Stage Lighting Layout with LED Products?

A stage lighting layout defines where LED fixtures are positioned, the coverage area of each fixture, and the beam angle required for front light, side light, backlight, and scenic illumination.

The chart shows practical beam-angle references for a medium indoor stage. Narrow beams are suitable for focused backlight and special effects, while wider beams provide broader front washes and scenic coverage. Final fixture selection depends on stage size, mounting height, throw distance, and the required illuminance.

The Main LED Fixtures Used in Stage Lighting

What Is a Stage Lighting Layout with LED Products?

The main LED fixtures shape the stage’s visual grammar. LED profiles, also called ellipsoidals, create sharp-edged beams, gobos, and controlled specials. They suit faces, scenic details, and isolated performers. LED Fresnels produce softer pools with adjustable beam angles. Their edges blend more naturally across scenery.

LED PARs and wash fixtures provide broad color coverage. They work well for backlight, side light, and saturated scene changes. Moving-head LED fixtures add pan, tilt, zoom, and animation. Pixel bars or linear fixtures can outline platforms and create rhythmic backgrounds. A 2023 U.S. Department of Energy solid-state lighting report notes that LED performance continues improving in efficacy, controllability, and color quality. However, stage output depends on optics, thermal design, and calibration. Higher wattage does not always create better skin tones.

Tips: Test faces from the audience position.

Use a lux meter when possible. The Illuminating Engineering Society recommends evaluating color with methods such as TM-30, rather than relying only on CRI. This matters when red costumes, wooden scenery, or darker skin tones appear under mixed colors. In practice, I still misjudge brightness when haze is present. Haze makes beams visible, but it can also hide uneven coverage. Leave overlap between fixtures, check camera flicker at the planned frame rates, and keep spare positions for failed units. A clear layout should show fixture type, beam direction, circuit data, focus area, and control address.

What Is a Stage Lighting Layout with LED Products? - The Main LED Fixtures Used in Stage Lighting

LED Fixture Type Primary Function Typical Beam or Field Angle Typical Power Range Color Capability Common Mounting Position Best Application in a Stage Layout
LED Profile / Ellipsoidal Precise, shuttered beam shaping and image projection Approximately 15°–50°, depending on the lens tube 150–400 W Fixed white, tunable white, or RGBAL/RGBAW Front of house, side positions, or overhead electrics Key lighting, actor isolation, gobos, and architectural framing
LED Fresnel Soft-edged general-purpose stage lighting Approximately 15°–50° with a zoomable field 150–350 W Warm white, daylight, tunable white, or color-mixing LED systems Front light, overhead electrics, and side booms Even washes, natural-looking faces, and theatrical area lighting
LED PAR / Wash Light Broad color washes and compact general illumination Approximately 10°–60° 50–250 W RGB, RGBW, RGBA, or RGBAL Floor, truss, overhead electrics, and side positions Background color, stage washes, uplighting, and cyc illumination
LED Moving-Head Spot Automated projection, beam movement, and visual effects Approximately 5°–50° zoom range 200–600 W White LED with color wheel, or multi-color LED engine Overhead truss, rear truss, or side towers Gobos, aerial looks, dynamic focus changes, and concert effects
LED Moving-Head Wash Fast, remotely controlled area and audience washes Approximately 10°–60° zoom range 200–800 W RGBW, RGBA, or RGBAL Truss, rear risers, and side towers Large color fields, sweeping movement, and audience lighting
LED Followspot Manual or remote tracking of performers Approximately 5°–15° 300–1,000 W High-output white, often with color correction or color mixing Rear of auditorium, control booth, or elevated followspot platform Musicals, live events, awards, and speaker highlighting
LED Batten / Pixel Bar Linear color effects, pixel mapping, and vertical or horizontal washes Approximately 20°–50° 40–300 W per unit RGB, RGBW, or individually pixel-controlled multi-color LEDs Set pieces, truss, scenic structures, and stage floor Chases, gradients, scenic accents, and video-style effects
LED Cyclorama / Groundrow Flood Uniform illumination of backdrops and cycloramas Approximately 30°–60° asymmetric or wide field 100–400 W per unit RGBW, RGBA, or RGBAL Stage floor, overhead border, or behind scenic elements Smooth background color, horizon effects, and seamless backdrop transitions

Typical specifications vary by fixture design, lens configuration, operating mode, and manufacturer. Beam angles and power ranges are provided as practical planning references for stage lighting layouts.

How to Plan LED Fixture Positions and Coverage

A stage lighting layout with LED products begins with coverage, not fixture count. Mark the acting area in one-metre squares, then place front, side, back, and overhead positions around those zones. Keep front fixtures about 30–45 degrees above eye level. This reveals faces without flattening the set. Add side light near waist and shoulder height for movement. Reserve backlight for separation, haze, or silhouette.

LED fixtures offer precise dimming and color control, but brightness alone is a weak planning method. The U.S. Department of Energy’s 2023 Solid-State Lighting R&D Opportunities report highlights efficacy, color quality, and controllability as major performance priorities. Its findings support comparing usable light, not advertised wattage. Check beam angle, lumen output, color rendering, and photometric files before final placement. A 25-degree beam may cover a small actor cleanly, while a 50-degree beam can soften edges across a wider area. Measure it on the floor.

The IES TM-30 method evaluates color fidelity and gamut through many color samples, rather than one simple rendering index. Use it when skin tones, costumes, or scenic colors matter. Leave overlap between neighboring beams, usually around 20–30 percent. Too little overlap creates dark seams. Too much wastes output and increases spill. Test with a real performer, because an empty stage can mislead you. I still find that first plans are often too symmetrical. Refine them after seeing shadows, camera angles, and sightline conflicts.

How to Connect and Control LED Stage Lights

A stage lighting layout shows where LED fixtures sit, but control begins with clear signal paths. LED stage lights usually need two separate connections: electrical power and control data. Power cables feed each fixture or distribution point. A DMX cable carries commands from the lighting console to the fixtures. Never treat a data cable as a power cable.

Connect the console to the first fixture’s DMX input. Link each fixture from DMX output to the next input, creating a daisy chain. Avoid random split points because they can cause flickering or delayed responses.

Set every fixture to a unique address, then match its mode and channel count in the console. The last fixture should use a proper terminator. Without one, unstable signals may appear during long runs.

Test one light at a time. It feels slow, but it reveals addressing mistakes quickly. Wireless control can reduce cables, although interference remains a practical concern.

Tips: Label both ends of every cable. Keep power and data lines separated where possible. Check the fixture’s manual before changing its control mode. Start with low brightness during testing, and confirm that pan, tilt, color, and dimming respond correctly. A small notebook helps record addresses and cable routes. I still find paper notes useful when a setup changes under pressure. Also, leave service space around each fixture. A perfect layout on paper may be awkward to repair.

How to Test and Refine the Lighting Layout

Testing a stage lighting layout begins with the real stage, not the drawing. Install the LED fixtures at their planned positions. Check beam angles, mounting heights, and sightlines from the audience area. A layout can look balanced on paper but create harsh shadows on faces.

Use a calibrated light meter to compare key areas. Measure the center stage, corners, entrances, and background. Keep brightness changes gradual between zones. Record color temperature and dimming levels for every test. A camera also helps reveal flicker, uneven skin tones, and distracting hotspots. Human eyes adapt quickly, so measurements prevent false confidence.

Test the layout during movement, dialogue, and music cues. Watch how beams interact with scenery, haze, costumes, and reflective floors. Reduce intensity when front light flattens facial features. Adjust side light when performers disappear during turns. The first arrangement may be wrong. That is normal. I often find one bright area pulling attention away from the performance. Mark that position, revise the angle, and test again from several seats. Leave time for a quiet review after the rehearsal. Small changes in height or focus can improve visibility more than adding another fixture. A reliable plan includes recorded settings, backup positions, and notes about what still needs correction.

FAQS

How should LED fixtures be positioned for stage coverage?

Mark the acting area in one-metre squares. Place front, side, back, and overhead fixtures around these zones. Front lights usually sit 30–45 degrees above eye level. Side lights near waist and shoulder height reveal movement.

Why is fixture brightness alone a poor planning method?

Brightness does not show useful coverage. Check beam angle, lumen output, color quality, and photometric files. A 25-degree beam suits a small area. A 50-degree beam covers more space with softer edges. Measure it on the floor.

How much beam overlap is usually helpful?

Leave about 20–30 percent overlap between neighboring beams. This reduces dark seams across the acting area. Too much overlap wastes output and increases spill. Too little creates gaps. Test with a real performer.

What should be considered when accurate colors matter?

Evaluate skin tones, costumes, and scenery under the actual fixtures. Use a color-quality method that examines many color samples. Do not trust one simple rating. Camera tests may reveal uneven skin tones that your eyes miss.

How are LED fixtures connected to a lighting control system?

Use separate connections for electrical power and control data. Power feeds the fixtures, while a DMX cable carries commands. Connect the console to the first fixture’s input. Link each output to the next input in a daisy chain. Never mix their purposes.

How can signal problems be reduced?

Give every fixture a unique address. Match its operating mode and channel count with the console. Terminate the final fixture correctly. Label both cable ends. Keep power and data lines separated when possible. Wireless control can reduce cables, but interference remains possible.

What is a practical way to test a lighting layout?

Install the fixtures on the real stage, then check beam angles, mounting heights, and audience sightlines. Measure the center, corners, entrances, and background with a calibrated light meter. Record color temperature and dimming levels. Test during dialogue, movement, and music cues. Not just an empty stage.

How should an imperfect lighting plan be refined?

Watch for harsh facial shadows, bright distractions, reflective floors, and performers disappearing during turns. Reduce front intensity when faces look flat. Adjust side-light angles when movement loses definition. Test from several audience seats. My first plan is often too symmetrical. That is worth questioning. Record corrections, backup positions, and service space around each fixture.

Conclusion

A stage lighting layout defines how light is distributed across the performance area to support visibility, mood, movement, and visual focus. Learning how to design a stage lighting layout with LED products begins with identifying the stage zones, audience viewing angles, performance needs, and desired atmosphere. Common LED fixtures include wash lights for broad, even coverage, profile lights for precise beams and highlighting, spotlights for focused attention, and bar or strip lights for background color and stage-edge effects.

Planning involves positioning fixtures at suitable heights and angles while reducing shadows, glare, and uneven brightness. After placement, the lights should be connected through an organized control system that allows operators to adjust intensity, color, movement, and timing. Testing is essential: inspect each area from the audience’s perspective, check color balance and coverage, and refine fixture positions or settings as needed. A well-developed layout combines practical visibility with creative flexibility, helping every performance feel clear, balanced, and visually engaging.

Sienna

Sienna

Sienna is a skilled marketing professional with a deep expertise in our company’s core products and services. With a passion for innovation and detail, she plays a pivotal role in crafting insightful blog posts that not only highlight the unique features of our offerings but also provide valuable......